Here’s the article, reposted here.
 On the surface, the Maker Movement with its’ focus on 3-D printing, hands-on craftsmanship, and industrial design may not seem an especially good “fit” for the English Language Arts (ELA) classroom. The ELA teachers I meet generally acknowledge Science, Technology, Engineering and Math (STEM) as important, but wonder how they can integrate STEM principles into Writers’ Workshop or Literature Circles. As our colleagues in science and the technical subjects learn to teach literacies to meet Common Core State Standards expectations, I see the integration of electric circuits in ELA, inspired by the Maker Movement, as interdisciplinary reciprocity. In my view, this activity can support the integration of ideas across content areas and build problem solving skills. I also learned that it can be a lot of fun. In what follows, I explain.
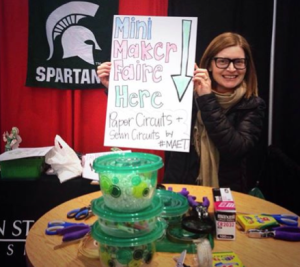
Last week, I co-hosted a Mini Maker Faire at the Michigan Association of Computer Users in Learning (MACUL) conference with my MSU Colleagues. The response from teachers was so positive that I wanted to share what we learned with the TILE-SIG Community.
We invited conference attendees to make a wearable electrical circuit using inexpensive and easily available materials. Inspired by the work of Jie Qi, the high-low tech team at the MIT Media Lab, and the work of Exploratorium, we wanted to push teachers’ notions of “technology integration” and highlight the potential of maker activities for interdisciplinary learning. Activity #1 invited people to add an LED light to their conference name badge using copper tape, a coin battery and scotch tape. Activity #2 invited people to sew an LED light into a felt badge using conductive thread, and a coin battery. Step-by-step instructions and lists of materials with links can be found at our program blog. I think TILE-SIG members can leverage two important insights from our Maker Faire experiment.

Firstly, light can be used to communicate meaning. To me, this opens infinite possibilities for connections to the ELA classroom. Teachers could ask students to draw a picture that integrates an electric circuit with light, strategically placed, to emphasize an especially poignant action, character trait, or feature of the landscape in a novel. Students could write (digitally?) about the meaning they have conveyed in their art, why they made this choice, and how it was inspired by their reading. Alternatively, students could create a video of themselves describing the meaning in their electric art and share it via YouTube. They could also explore or respond to meaning in their classmates’ circuits during a multimodal writers’ workshop. Younger children could practice writing how-to texts to explain how they made the LED light shine. In this way, this multimodal ELA project becomes the week’s science project too.
Secondly, these activities generated a lot of smiles. Two hundred colleagues made a wearable electric circuit with us last week and every one of them smiled when their LED lit up. Every participant said “that was cool,” or “I’m going to do this with my students”. The first principle of any project-based learning is authentic engagement. If electricity can put smiles on our students’ faces, they will be more likely to persist in the face of challenge, more likely to care about the learning, and more likely to take risks in any discipline, ELA included.
In sum, I see the integration of simple electric circuits into ELA classrooms as an engaging way to bring science and language arts curricula together for students of any age and I encourage TILE-SIG members to give it a try! if you do, please let me know how it goes!
For more information on the Maker Movement and DIY project ideas: http://makezine.com/
For more curricular connections ideas, see the embedded .pdfs for Social Studies, ELA, Visual Art and Any Discipline at our blog post.
]]>You will also find an array of materials to help you make explicit connections between this activity and your curriculum.
How to Sew a Circuit into a Felt Badge
Materials
Two pieces of felt (Green and White, preferably)
An LED light (Green or White, of course)
A coin cell battery
A coin cell battery holder
Conductive thread [length will vary depending on your ambitions]
Scissors for cutting thread
A needle
Garden variety white thread
[long enough to sew around the badge]
Procedure
1. Put the battery in the battery holder. The “plus” side should be facing up. The plus sign should also be facing toward the “E” shape of the battery holder.
2. Thread the conductive thread through one end of the diode on the battery holder. Tie a knot to connect the thread to the diode.
3. Thread a second piece of conductive thread through the other end of the diode on the battery holder. Tie a second knot.
4. Puncture the felt with the ends of the LED light. The light bulb will be on the outside of the badge. The two ends of the LED will be on the inside of the badge, attached with conductive thread to the battery holder.
5. Once punctured through the felt, bend the ends of the LED so that they’re flat against the felt — you’ll have to bend them down too so that they don’t stick out the sides of your badge.
6. Before you sew, check to make sure the positive end of the battery holder is connected to the positive end of the light; the negative to negative. Test this by seeing if your light illuminates when you touch the ends to the diode. You will extend this same circuit with conductive thread. Remember which end of the light attaches to which end of the battery holder.
7. Position your Battery Holder below the ends of the LED light so that you can sew the conductive thread through the felt and around the ends of the LED light. You only have one strand of thread for each end. Threading the needle with the conductive thread can be a bit tricky…but don’t lose patience!
8. Once you have both ends of your LED light sewn into the felt with the conductive thread, you should have an electrical circuit and the light should be shining!
9. Put the back on your badge by sewing it together with the other square using the regular white thread. The battery should be on the inside.
10. Once you’ve sewn it, together, attach an MAET button under the light.
You can leave the top of your badge open so you can remove the battery…but if you sew it shut, it will last many days! The light pictured above has now been shining non-stop for six days…
And voilà! A wearable circuit that glows Spartan spirit!
Thanks to Scott Westerman, MSU’s Associate Vice President for Alumni Relations for helping us pilot this project!
This project was originally inspired by the great things happening at exploratorium.edu. This post and this post were especially helpful to us! Thank you!
]]>Here’s one of the activities that we’ll be doing with our MACUL Maker Colleagues.
How to Make a Paper Circuit from your MACUL Name Badge
Materials:
MACUL Name Badge
Tiny LED Light {or similar}
Tweezers
Double-sided Scotch Tape
Copper Tape
Scissors
Coin Battery
Procedure:
-
Decide where you would like to place the light for meaningful effect. Do you want to light up the “i” in your name on your name badge? The “M” in MACUL?
-
Plan out your circuit. Based on where the light will go, decide where to place the battery and how long your copper tape will need to be.
-
Cut the copper tape in half. You’ll need two lines of tape, placed very closely together to make the circuit work. Plan the placement of the two pieces of tape on your name badge.
-
To make the circuit, position one piece of copper tape so it will connect to the negative side of the battery; position the other piece of tape so it connects with the positive side of the battery. Use Scotch tape to fasten the battery to your name badge.
-
Stick the copper tape down on your name badge — being very careful to ensure the the pieces are placed very close together. The LED light is SMALL. To get a good connection, there should be very little space between the two strips of copper tape.
-
Place the LED light strategically. Test it by pressing it against the strips of copper tape with the tweezers. Does it light up? If not, flip the diodes.
-
Stick the LED light down onto the copper tape using the double-sized Scotch.
-
Voilà! You have a paper circuit and a very fancy MACUL name badge!
This project was inspired by the great things happening over at Exploratorium.edu.
SIGN UP: http://www.signupgenius.com/go/20F094EA5A82CA57-maet
]]>